Create a route on a map between two points
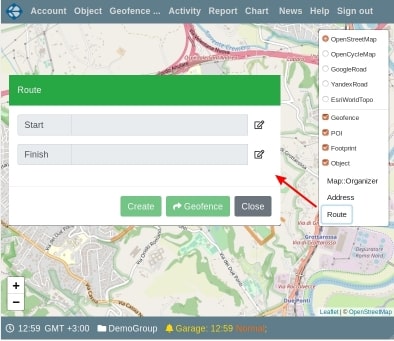
The “Route” button is located in the map control (the button in the upper right corner of the map area). When you click on the “Route” button, a panel for creating a route will open. It is necessary to fill in the “Start” and “Finish” fields. To do this, click on the edit button to the right of the corresponding field. This will open the address setting panel.
In the new version of the panel, in addition to the address search button, a button for setting the address by location on the map is added. When you click on this button, the map opens and you can click to the desired location. An address will be determined for it and the address field will be filled. If this address suits you, you can add it to the route (in the corresponding “Start” or “Finish” field). When all the fields are filled in the panel, the “Create” button will be enabled. When you click on it, a route will be created.

The route will be displayed on the map with markers of the beginning and end of the route. The route is saved and is always displayed on the map until you clear it by clicking on the "Reset" button. The route is saved on the device (smartphone or laptop), if you log into your account from another device the route will not be visible. In order to display the route, you can click on the “Display” button. In this case, the entire route will be displayed on the map at the maximum possible scale of the map display. For the created route, you can create a geofence of the "Polyline" type. When you click the "Add to geofences" button, a window will appear with a variant of the name of the geofence: truncated names of the starting and ending addresses of the route. You can edit this name and save the route in your geofences. It is important to keep in mind that the geofence will be created for the group in which you are currently located.
On the Vialam service YouTube channel, a one-minute video presentation is available.